Sunday, March 31, 2013

My Husband Paints Some Pieces

My husband is the one who truly inspired me to believe I could paint furniture.  When we bought our house it needed a lot of work done especially in the basement.  He tackled any project whether he had experience with it or not and was able to make our house into what it is today.

I couldn't be more proud of him and all his hard work!  Without him even knowing it, he truly inspired me to try painting furniture without any experience.  Thanks babe!


After a few months of me painting my husband mentioned what I was doing to some of the guys at his job.  One of his friends had a chest that was broken and was going to throw it out, but thought maybe I would like to fix it up.


The trim at the bottom had broken off and the top had also come off the hinges.  My husband fixed it for me to paint, but I asked him since he fixed it up wouldn't he like to paint it.  He did!


He chose Behr Tropical Waters for the first coat and a black for the second coat (in homemade chalk paint).  He added wood trim stars and I distressed it for him. 

Isn't it awesome?  It sold in less than three weeks.  My first piece took more than a month to sell!

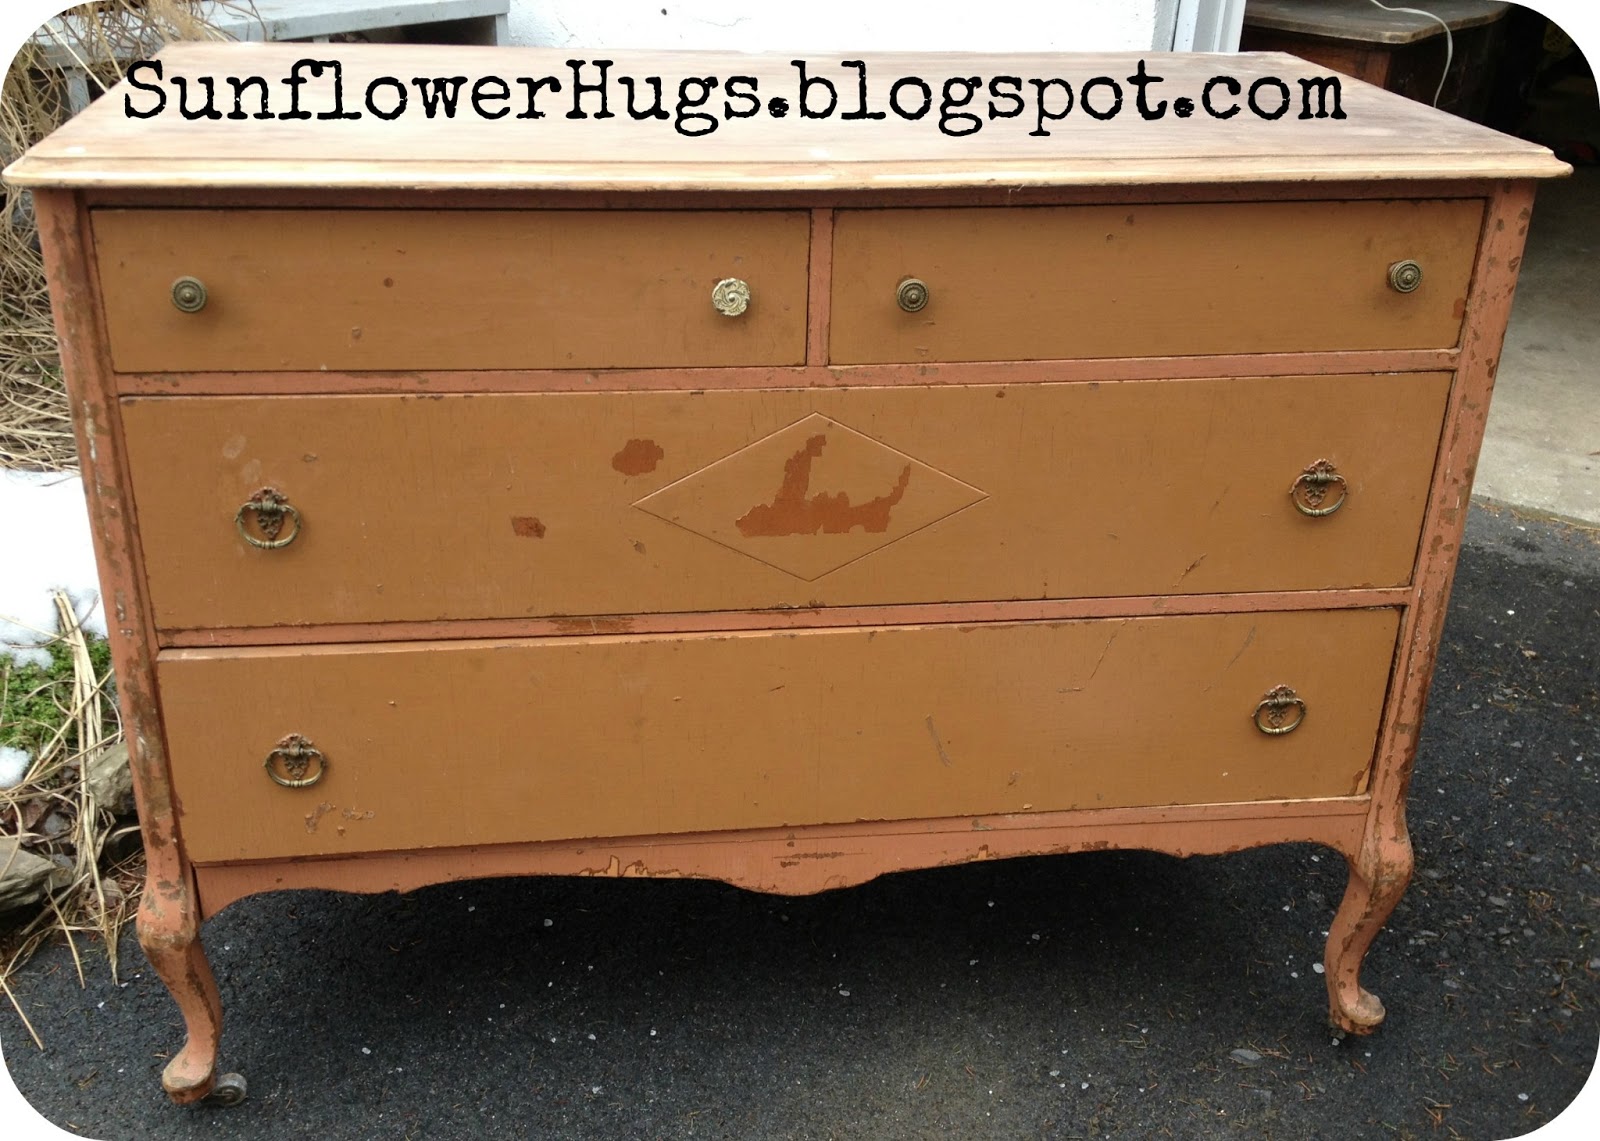
Next up was the $1 dresser I got from the auction.  The veneer and second layer came off the top across the entire back and it just needed to get covered up.  

I asked my husband to get wood and trim to cover it up.  Once again, since he fixed it up I asked him if he would like to paint it and he did!  He painted the top and body black and the drawers Valspar Midnight Fog.
I love his perspective!  He didn't distress the paint and chose to polyurethane the top in a high gloss and wax the rest with Minwax Finishing Paste.  He picked out gorgeous brass knobs I had in my stash and polished them up.  It is so different than what I would have done, but I love it!

Linking to:
Life On Lakeshore Drive
Lovely Crafty Home
I Heart Naptime
I Should Be Mopping The Floor
Craft-O-Maniac
Coastal Charm
Lolly Jane
My Uncommon Slice of Suburbia 
Homemaker On A Dime
Kathe With An E
Elizabeth & Co.
Not Just A Housewife
Kammy's Korner
Cozy Little House 
The DIY Dreamer
The Real Housewives of Riverton
Southern Lovely
If Its Not Baroque...
Fluster Buster
House of Hepworths 
The Shabby Creek Cottage 
Embracing Change
I Gotta Create 
Domestic Superhero
A Creative Princess
Beyond The Picket Fence
Crafty Scrappy Home
Miss Mustard Seed
The Shabby Nest 
Simple Home Life
Redoux
Funky Junk Interiors 
Too Much Time On My Hands


I was featured:
Lovely Crafty Home
Power of Paint

Wednesday, March 27, 2013

Secondhand Scores #2

When I was a kid my parents went to garage sales all the time.  I admit I was totally embarrassed by it.  I never really bothered going regularly until after I had my son.  I realized I could get clothes and toys and things for him for pennies on the dollar and that is when my love for secondhand was born.

Garage sales are my favorite but I also go to flea markets, thrift stores and auctions.  I am always on the hunt for furniture to paint, stuff for myself, my house, my kids and unique items that I could put to future use.  I love the thrill of finding something that was once very expensive for as little money as possible.


In this series, I will share my scores to show you how much you could get for your hard earned money.  Some days I hit jackpots, some days I get nothing, but I always have fun.


$$$$$$$$$$$$$$$$$$$$$$$$$$$$$$$$$$$$$$$$$$$$$$$$$$$$$$$$$$$$$$$$$$$$$$$$$$$$$$$$$$$$$$$$$$

I found a new furniture auction.  It is small and goes very quick.  They do it twice a month and the one I went to I scored big!

I got this cute little bench for $1!

This table for $1!
AND this dresser for $1 as well!!!  I couldn't believe it myself!
I had my daughter with me and I couldn't fit the dresser in the car with her.  I dropped her off at home and when I went back to get the dresser I noticed there was another dresser sitting next to it marked NO SALE.  How I missed it during the auction, I don't know.  I asked them if they were going to sell it at the next auction and they said no--I CAN HAVE IT IF I WANT IT!!!!!
Ummm, yes please!  They were worth it for the hardware alone, but they were both structurally in good shape.  With some creative painting I should be able to work with them.


Linking to:
Southern Lovely
The Real Housewives of Riverton
I Gotta Create
House of Hepworths 
The Shabby Creek Cottage
Embracing Change
Mom On Timeout
Domestic Superhero
All Things With Purpose
Funky Junk Interiors
Life On Lakeshore Drive
Lovely Crafty Weekend
I Heart Naptime
I Should Be Mopping The Floor
Craft-O-Maniac
Coastal Charm
Lolly Jane
My Uncommon Slice of Suburbia 
Homemaker On A Dime
Kathe With An E
Elizabeth & Co.
Not Just A Housewife
Kammy's Korner
Cozy Little House
The DIY Dreamer
Bright Green Door

Sunday, March 24, 2013

White Hutch

The consignment store where I sell my painted pieces had this hutch that a customer was interested in, but it was too dark for her taste.  The owner told her that I could paint it.  She loved that idea and bought the hutch specifically for me to paint.  
She wanted it to be white.  I searched a bunch of painted hutches on Pinterest and found some where the top of the base and the back of the shelves were left the dark wood.  Since the piece was in good condition, I suggested this to her and she agreed to it.

I honestly pushed this because I knew painting the top part of the hutch was going to be a lot of work.  Little did I know that I really didn't save myself any work.  I had to take the time to tape off the back panel as I could not remove it without damaging it.

Normally I buy the sample pot of paint, but since this piece was so large, I bought a quart.  I wasn't worried about having leftover as I can always use white paint.  I picked Behr Powdered Snow to make into homemade chalk paint.

I was able to paint the top and bottom pieces separately.  I usually put pieces up on a table so I don't have to bend to paint.  This makes painting so much easier.  I quickly gave the base two coats of paint and wished that was all to this project.
Then I started the work on the top part.  This is where I had to tape the back of the shelves.  It took twice as long to finish the top as it did the bottom because the taping and painting all the sides of the shelves (top, bottom and two sides each).
Even though it was a LOT of work, I think it came out gorgeous!
I heavily sanded all the edges and the rich dark wood peeks through giving it so much character.  I gave a quick coat of dark wax to the top and used Minwax Paste Finishing Wax on the rest.  I didn't do a thing to the hardware.  
The bottom half could really stand on its own, but the top steals the show!
I am so glad she agreed to leave the top of the base and the back of the shelves the dark wood.  It really makes the piece pop. 
The two doors on the top have glass, but I did suggest to her to put in some chicken wire as an option.  Either way, I think it came out so nice!

Linking to:
Life on Lakeshore Drive | I Heart Naptime | Classy Clutter | Craft-O-Maniac | Homemaker On A Dime | I Should be Mopping the Floor | Coastal Charm | Kammy's Korner | Today's Creative Blog | My Uncommon Slice of Suburbia | Kathe With An E | Not Just A Housewife | Elizabeth & Co. | {Primp} | The DIY Dreamer | If Its Not Baroque | Fluster Buster | Southern Lovely | The Real Housewives of Riverton | I Gotta Create | Mom On Timeout | Embracing Change | The Shabby Creek Cottage | House of Hepworths | Domestic Superhero | All Things With Purpose | Funky Junk Interiors | Restoration Redoux

Featured by:
My Uncommon Slice of Suburbia
Kammy's Korner
The Real Housewives of Riverton
Restoration Redoux
Mom On Timeout

Sunday, March 17, 2013

Bright Green Shelf

I don't always know the correct terminology for the pieces of furniture I paint.  What is this?  A cabinet?  A shelf?
I went with shelf.  And this shelf wanted to be a bright green.  Just in time for St. Patrick's Day!  

I knew I was going to use the dark wax "glaze" technique and really wanted it to show up, I painted in all different directions so the wax had the brush marks to settle into.  I also used a new paint brush I found at True Value.

It is an oval sash brush, but I didn't know that when I bought it.  It looked like a poor man's version of an AS oval brush and I thought it would be worth a shot to try it since it was only $6.99.
You get what you pay for though and the bristles kept coming out so I had to keep picking them out of the paint the whole time.  It did do the trick with leaving a lot of brush strokes and the dark wax helped tone the color down, but I still think it is really bright.
It had some pitting in the wood that I made sure I got the dark wax in.  I was a huge departure from what I normally do, but sometimes you just have to change things up--right? 

Happy St. Patrick's Day!


Linking to:
Life On Lakeshore Drive 
I Heart Nap Time 
Too Much Time On My Hands
Craft-O-Maniac  
Classy Clutter
I Should Be Mopping The Floors 
Coastal Charm
DIY Showoff
My Uncommon Slice of Suburbia
Kammy's Korner
Kathe With An E
twelveOeight 
Not Just a Housewife
Elizabeth & Co.
The DIY Dreamer
If It's Not Baroque
{Primp}
Lolly Jane
Southern Lovely
Mom On Timeout
I Gotta Create
House of Hepworths
Embracing Change
The Shabby Creek Cottage
Miss Mustard Seed
The Shabby Nest  
Lovely Crafty Home 
Beyond The Picket Fence 
Crafty Scrappy Happy 
A Creative Princess
Redoux  
Six Sisters' Stuff
Funky Junk Interiors 
The Real Housewives of Riverton

Wednesday, March 13, 2013

Secondhand Scores #1

When I was a kid my parents went to garage sales all the time.  I admit I was totally embarrassed by it.  I never really bothered going regularly until after I had my son.  I realized I could get clothes and toys and things for him for pennies on the dollar and that is when my love for secondhand was born.

Garage sales are my favorite but I also go to flea markets, thrift stores and auctions.  I am always on the hunt for furniture to paint, stuff for myself, my house, my kids and unique items that I could put to future use.  I love the thrill of finding something that was once very expensive for as little money as possible.


In this series, I will share my scores to show you how much you could get for your hard earned money.  Some days I hit jackpots, some days I get nothing, but I always have fun.


$$$$$$$$$$$$$$$$$$$$$$$$$$$$$$$$$$$$$$$$$$$$$$$$$$$$$$$$$$$$$$$$$$$$$$$$$$$$$$$$$$$$$$$$$$

It is March in PA and not garage sale/flea market season just yet.  This score was from the Encore Store in Pottsville, PA.

Yards and yards of Rick Rack for $1 each.  It totally reminds me of my mother.  I get so happy just looking at it!

Up the block at the Salvation Army I got this beat up night stand for $1.  It is in very poor shape, but I figured it was worth getting to experiment on.  **Update, this piece was too damaged and I wound up just throwing it out.

I made quick use of the rick rack.  I made a banner out of an old pair of jeans, stenciled my daughter's name in lavender and sewed the yellow rick rack across the top.  


Linking to:
twelveOeight
{Primp}
DIY Dreamer
Southern Lovely
If It's Not Baroque...
A to Zebra Celebrations
Mom On Timeout
Embracing Change  
I Gotta Create
A Creative Princess  
Beyond The Picket Fence
The Shabby Creek Cottage  
House of Hepworths
Domestic Superhero
The Shabby Nest
The Shady Porch
Lovely Crafty Home
Redoux
Sassy Little Lady
Craft-O-Maniac
Classy Clutter  
I Should Be Mopping The Floors
Life On Lakeshore Drive 
I Heart Naptime 
Too Much Time On My Hands 
Coastal Charm
DIY Showoff
My Uncommon Slice of Suburbia
Kammy's Korner
Kathe With An E 
Not Just a Housewife
Elizabeth & Co.
Lolly Jane
Miss Mustard Seed
Six Sisters' Stuff  
Funky Junk Interiors
Bright Green Door

Sunday, March 10, 2013

Mustard Yellow Desk

I got this desk after someone already attempted to strip it.  They didn't quite finish the job--notice the 2 panels on the inside--they were still the original finish.
Since the top was already down to the wood, I planned to stain it.  For the base of the desk I wanted to do a mustard yellow color thinking it would look great with a dark stained top.

Turns out this color was harder to choose than I thought.  I first bought a sample pot of Behr Mustard Brown to mix into homemade chalk paint.
I painted the desk with two coats of it and it came out a strange yellow green color.  I was convinced HD mixed me the wrong color.  So back to HD for another sample pot and this time I picked Yellow Gold as it was the next color up on the color card from Mustard Brown.  I was hoping it would come out to be the right color.
I painted one coat of this color on the desk and was still not 100% happy with the results.  Not wanting to paint it a fourth time, I moved on to distressing and then used the dark wax "glaze" technique hoping it would alter the color to what I wanted.  It did!  Take a look at the results...
BAM!  Look at that transformation!
I went VERY heavy with the dark wax glaze. I globbed it on all over and extra heavy in all the nooks and crannies, especially in the braided trim at the top. I even let the wax sit for a little longer before I wiped it away. It really toned down the bright color a lot.
I soaked the hardware in white vinegar to clean it and then buffed it. 
I stained the top with Minwax Dark Walnut and also used the dark wax glaze to darken the color more.  I finished the top with two coats of Minwax wipe on poly.  Since I used the dark wax on the paint, I didn't have to wax again, I just buffed it after the wax cured. 

I am still not sure if this color is really a mustard yellow, but I think it looks gorgeous!

Linking to:
Too Much Time on My Hands
I Heart Naptime
Life On Lakeshore Drive
Navy Wifey Peters
DIY Showoff
Craft-O-Maniac
Classy Clutter 
Coastal Charm
Homemaker On A Dime
My Uncommon Slice of Suburbia
Lolly Jane
Crafty Scrappy Happy
Kammy's Korner
Kathe With An E
Today's Creative Blog
Not Just A Housewife
Elizabeth & Co.
TwelveOeight
{Primp}
The DIY Dreamer
Southern Lovely
If It's Not Baroque...
A to Zebra Celebrations
Mom On Timeout
Embracing Change  
I Gotta Create
A Creative Princess  
Beyond The Picket Fence
The Shabby Creek Cottage  
House of Hepworths
Domestic Superhero
The Shabby Nest
The Shady Porch
Lovely Crafty Home
Redoux
Sassy Little Lady
Miss Mustard Seed
Six Sisters' Stuff 
Funky Junk Interiors
The Real Housewives of Riverton

Featured by:
twelveOeight 
Embracing Change
Elizabeth & Co.
{Primp}
I Gotta Create
Shabby Creek Cottage
Redoux
Lovely Crafty Home 
Simple Home Life
Power of Paint

Sunday, March 3, 2013

Pottery Barn Burlap Easter Flag Knock Off

Pottery Barn's spring catalog is out and they have a burlap bunny flag on page 13 that they are selling for $39 that I knew I could totally make for a few dollars worth of materials I had on hand.
{Pottery Barn}
A few months back I got a 60% off coupon for any full price item at JoAnn's and I used it to buy a bolt of burlap.  I live about 45 minutes from the nearest JoAnn's so I thought it would be best to buy the bolt so I wouldn't have to keep making trips for projects.  It is normally $3.99 per yard, so 60% off brings it to $1.60 yard and I used less than a yard for the flag.  

I started by searching bunny silhouettes online.  I found one close to the original and I sized it to be 23" tall by 14" wide.  It fit on six pieces of paper (two across, three down).  I was able to set the photo with transparent color which basically let me change all the black to white, but left an outline of the bunny.  This saved me a ton of ink! I also drew in a tail since the silhouette I found didn't have one.

The PB flag has the bunny in a white color burlap.  I didn't have that, but I did have a cream canvas material I bought at a garage sale. They were homemade curtains and I got a bunch of panels for $3.  I used less than one panel for the bunny.  I just pinned the paper template to it and cut it out.

The PB flag measures 30" wide x 38" tall.  The burlap is 44" and I cut a piece off at 28" because 30" seemed too wide for the bunny I made.  I ironed the edges and gave it a 1/2" seam on both sides.


Next I chose to stencil Happy Easter in my 3" Arial font letters in a cream color close to the canvas fabric color.  I used latex paint as this is what I have on hand for painting furniture.  This part of the process took the longest as I didn't want to do one letter at a time and take a chance it would come out all wonky.

First I stenciled the words on paper with a black marker and cut the paper as close to the words as possible.  To find the center of the words and the burlap I folded the paper in half, folded the burlap in half and placed the fold of the words on the fold of the burlap and pinned them down.  (The photo above shows the words on top of the burlap, but I had to actually pin them UNDER the burlap to be able to paint on top of them.)  I then propped the burlap up on a piece of glass and used the flashlight app on my iPhone to create a light box to find them to place the stencil on top.  This was the best way I could figure out how to do the entire word at the same time and keep the letters level and spaced properly.

After the words were stenciled, I was able to position the bunny applique on the burlap above the words and pin it down to sew.

I haven't sewn an applique since 7th grade sewing class, so I had to check out a few YouTube videos for some techniques and I was confident I could do it with a straight stitch.  I went very, very slow especially around the curves.  At the curves you have to stop, make sure the needle is down, lift the presser foot and turn the material to follow the shape.  I even hand cranked so I had more control.  I was able to go around the whole applique with one stitch!  I was totally prepared to have to make some fixes, but since I went really slow, it worked out.

After that was done, I ironed and hemmed the bottom and created a rod pocket at the top. But instead of using an actual rod, I used a stick from my yard and tied jute string to it to hang it from.

Didn't it come out great?  I am so proud of myself for being able to get it done and not having too much trouble in the process.  Even though it only cost me a few dollars using materials I had on hand, it did take quite a few hours (more than I care to admit) over the course of three days to get done.  

When I went to get the link to Pottery Barn for the flag, it said it is already no longer available!  So if you want it, you have no choice but to make it!  Or you can pay me $39 to make it, but I can't promise I could get it done by Easter--ha!  If anyone wants the bunny template I used, leave me a comment and I can email it to you in a pdf file.


Linking to:
I Heart Naptime
Life On Lakeshore Drive  
Navy Wifey Peters
DIY Showoff  
I Should Be Mopping The Floor
Classy Clutter
Craft-O-Maniac
Homemaker On A Dime
The Shabby Creek Cottage--6 Days of Spring
Thrifty Decor Chick
Coastal Charm
Today's Creative Blog
Kammy's Korner  
Kathe With An E
Not Just a Housewife 
Elizabeth & Co.
The DIY Dreamer
{Primp}
Southern Lovely
Fluster Buster
House of Hepworths
A Creative Princess  
Beyond The Picket Fence
Embracing Change  
Shabby Creek Cottage
I Gotta Create
TwelveOEight
The Shabby Nest
Liz Marie
Crafty Scrappy Happy
Redoux
Sassy Little Lady
The Best Blog Recipes
Six Sisters' Stuff
Funky Junk Interiors
Mom On Timeout
My Uncommon Slice of Suburbia

Featured by:
Knock Off Decor
Glamorous Bride
Embracing Change
Craft Gossip
TwelveOeight
Beyond The Picket Fence