
Back in June I scored an overhead projector off of craigslist for $30.
 |
| Doesn't it kind of look like Johnny 5 from the movie Short Circuit? |
It has to do with this large framed artwork I got just the other week for $1.50.

Step 1: Separate the frame from the artwork.
Step 2: Paint the frame with two coats of paint color of your choice mixed into homemade chalk paint, once dry distress with sanding sponge.
Step 3: Paint two coats of homemade chalk paint in black right over the daisy picture.
Step 4: Once dry, season the chalkboard with a big piece of white sidewalk chalk. It made quick work and I only needed to use one piece of chalk.
Step 5: Wipe the board down and then put it back into the frame.

Step 7: Set the projector up and project the image onto the chalkboard to the desired size and area.
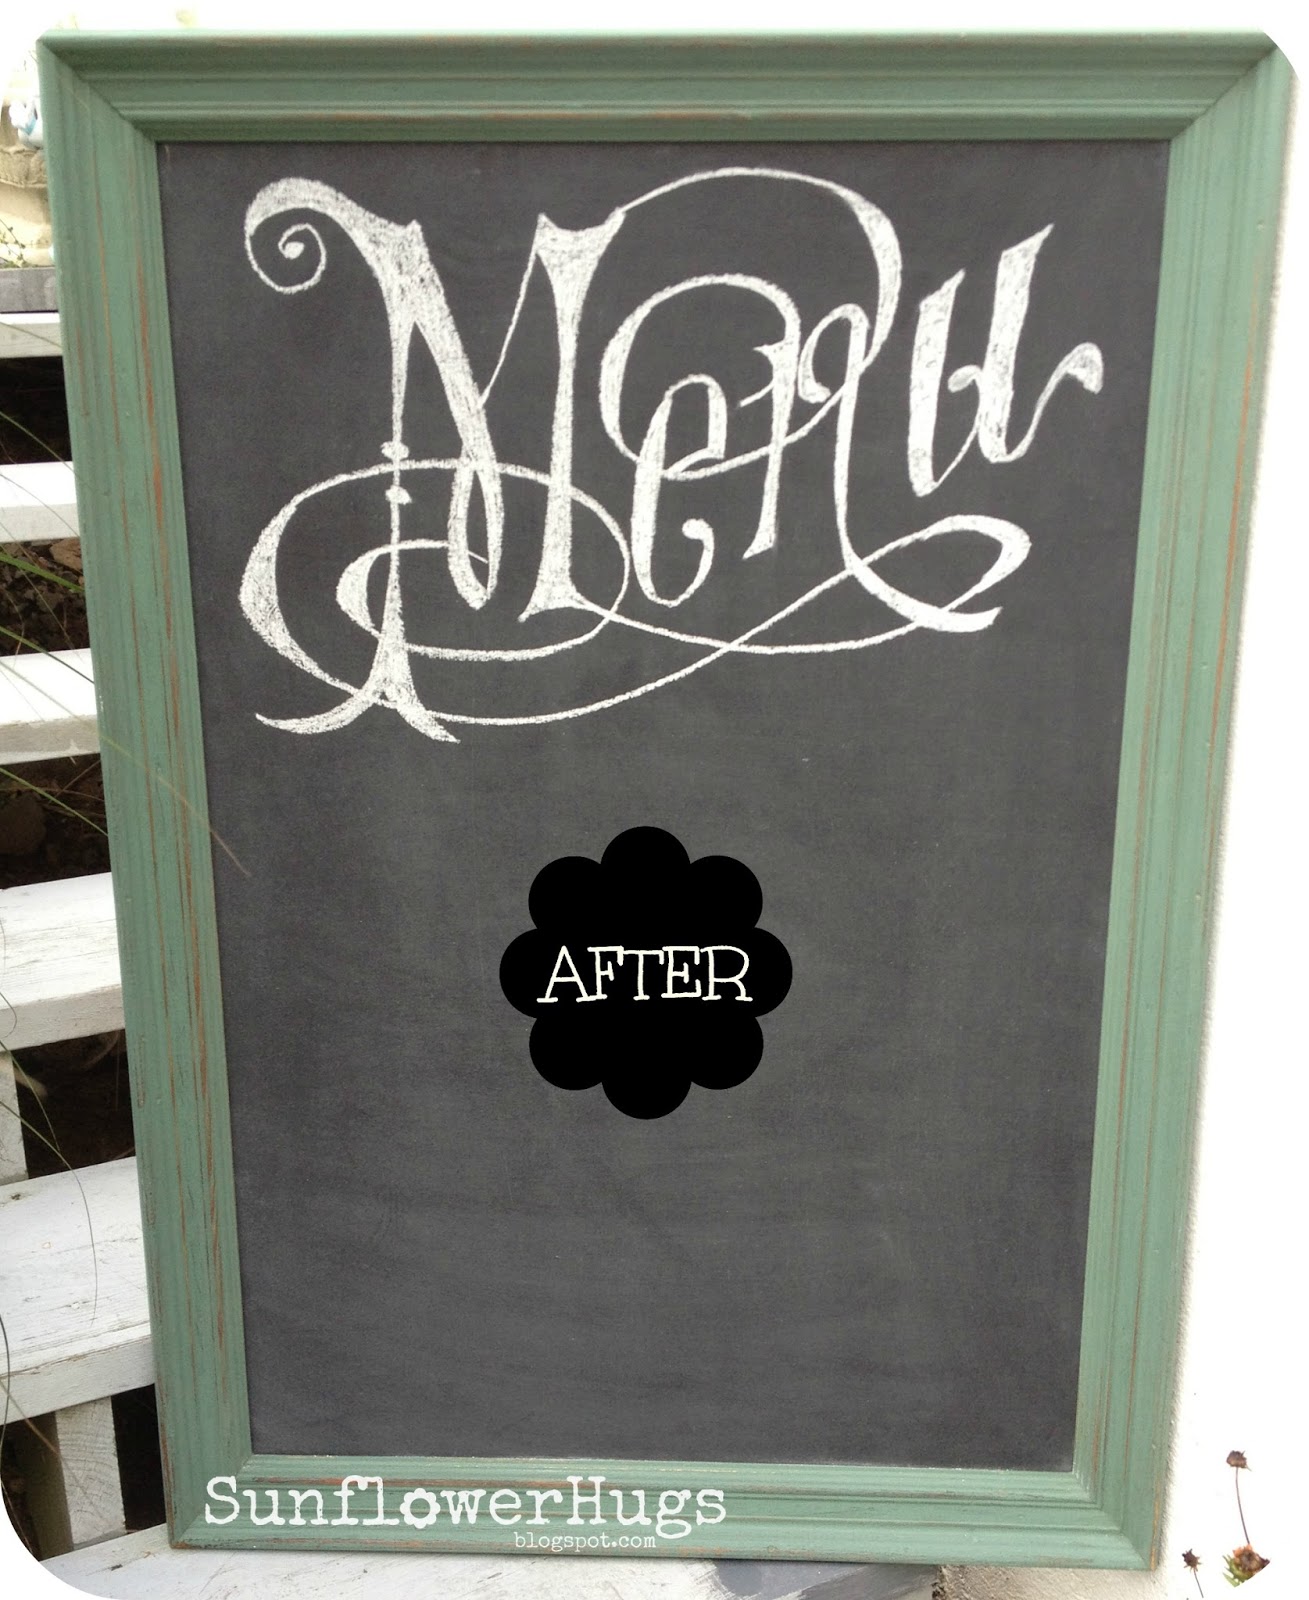
Step 8: Be totally surprised at just how easy and quick it was to trace the word! I loved every second of it. If I made a mistake I just wet my finger and wiped off the chalk--no biggie!
Step 9: After tracing the word, color in the thicker parts. I was done in 15 minutes.
Here it is!

Linking to:
Silver Pennies
DIY Showoff
Creative Home Expressions
I Should Be Mopping The Floor
Dwellings
Craft-O-Maniac
Rain On A Tin Roof
Home Coming
The Dedicated House
Graphics Fairy
Coastal Charm
Cozy Little House
Love Grows Wild
Table For 7
My Uncommon Slice of Suburbia
Kathe With An E
Elizabeth & Co.
Not Just A Housewife
Kammy's Korner
VMG206
The Winthrop Chronicles
Savvy Southern Style
Fluster Buster
Yellow Bliss Road
The DIY Dreamer
Polkadots On Parade
Real Housewives of Riverton
The Blissful Bee
Saving 4 Six
The Shabby Creek Cottage
Lamberts Lately
Sweet Haute
I Gotta Create
Living Well, Spending Less
Start At Home
Domestic Superhero
Finding Fabulous
Liz Marie
Redoux
Shabby Nest
Crafty Scrappy Happy
Obsessive And Creative
DIY Vintage Chic
Today's Creative Blog
Funky Junk Interiors
The Happy Housie
Featured by:
Silver Pennies
Creative Home Expressions
The Winthrop Chronicles
VMG206
Oh my, I can see the the possibilities would be endless. Love the Menu script!
ReplyDeleteThanks for the idea. I bought an overhead projector at a flea market in the spring. I wasn't sure where I would get transparencies and now you've told me.
ReplyDeleteGuess what I just searched for on my craigslist! So many ideas! Thanks for sharing!
ReplyDeletelove it=love dee x
ReplyDeletethis is fantastic. I'm so going to find a projector! I love the colors you used.
ReplyDeleteGreat, great project!!!
ReplyDelete-andi
This looks SO great. Great idea and thanks for linking up to The DIY'ers!
ReplyDeleteGreat job, Susan! I love that Menu graphic and have used it myself. Great score on getting a projector, too. I've read on other blogs where it can be a big help on doing images on walls and furniture.
ReplyDeleteThanks for linking up to The Creative Home & Garden hop! : )
I love the graphic and the idea of using the overhead projector.
ReplyDeleteOoh guess I'm going to be stalking overhead projectors on craislist now! ;) What a great idea, and it turned out beautifully! I popped over from Give Me the Goods-- thanks for sharing!
ReplyDelete~Abby =)
Terrific! I wouldn't have thought to use an overhead projector. You did a fabulous job! I am visiting from Nifty Thrifty Tuesday and am a new follower of yours. I wold love for you to stop by Still Woods Farmhouse for a visit and to follow along if you like. Thanks for the inspiration!
ReplyDeleteBlessings from Still Woods Farmhouse
Wow, I love it! You did a great job on this..... You are so very talented!
ReplyDeleteCool!!
ReplyDeleteOk now I need to get me a projector! lol...it looks fantastic, imagine using it to decorate for the next holidays!
ReplyDeleteThank You for sharing at the Fluster Buster Party! come join us again next week! Lizy
This is great! I just finished a large framed chalkboard that we will be using at our wedding. I tried out the transfer technique with chalk being rubbed on the back of a printed sheet of paper and then flipped it over and traced over with a pencil - worked great. Our menu is realllllly big though so I may have to use the other technique for smaller frames and use our projector for the menu - not a bad idea to put our menu all together in photoshop and then take it to Staples to have it printed, great tip! I love the graphic you used from the Graphics Fairy :)
ReplyDelete~Katie @ Upcycled Treasures
Fab job Susan! x
ReplyDeleteWow, this looks amazing. Love the "menu" on it too! Thanks for sharing at Silver Pennies Sundays. x
ReplyDeleteGreat idea! That looks fantastic! My husband is a teacher..I am thinking of borrowing of his overhead for some project now :) Thank you so much for sharing at Share your Stuff Tuesdays..have a great weekend!
ReplyDeleteI love it! I just shared a post this week about making a chalkboard out of an old oval mirror and I traced the letters onto the board too. I didn't have an overhead projector...boy it sure would have been easier if I had!
ReplyDeleteI love chalkboard paint!
Fabulous idea! I love all these chalkboard paint ideas, and yours helps me to write in a really beautiful font! Love it!
ReplyDeleteI found you through the Craft Frenzy Friday Link Party where I have the following projects linked; Spooky Halloween Card and Subway Art Printable, would love it if you'd stop by too.
Hugs, antonella :-)
What a great find, you will get so much use out of it! LOVE your chalkboard and the font is so pretty! Thanks so much for sharing at AMAZE ME MONDAY!!!
ReplyDeleteBlessings,
Cindy
Another great transformation, Susan! Very creative. I really love the after. Chalk paint is so fun!
ReplyDeleteThank you for sharing at Brag About It this week!
~ Megin of VMG206
That really turned out great Susan!
ReplyDeleteI have been wanting to try this, yours turned out so great, now I really need to try it!!
ReplyDeleteThank you for linking up to my Furniture & Paint Party! Hope to see you again soon.
Brooke
startathome.blogspot.com
Hi Susan,
ReplyDeleteVisiting from The Graphics Fairy. Beautiful transformation. I, too, will now be scouring CL for an overhead projector. Great inspiration. Now following your blog. Hope you'll come visit me at http://altered-artworks.blogspot.com and say hello.
Doreen
Love, love, love this! I need to add an overhead projector to my wish list! So cute! Thanks for linking up at Get Your DIY On! Hope to see you back with your thrifty Halloween projects on Sunday at 7 pm EST! Enjoy your weekend!
ReplyDelete~Abby =)
This turned out really cute, Susan! I would just LOVE to score one of those projectors one day!!! It would change crafting as I know it :) I'm excited to be your 200th follower! :) SO glad you found my blog!
ReplyDeletexo Kylie @ Absolutely Arkansas